How to Do Your Own Manicure in 9 Steps
While a professional in-salon mani is always a treat, the ritual of an at-home manicure can feel just as luxurious if you’re a DIY type. And since we all got a little more practice over the past year with salons closed because of the COVID-19 pandemic, you may be closer than ever to perfecting your at-home technique. Of course, you’ll need the right products—including the best nail polishes, gel nail polishes, and cuticle oils—but you’ll also need a few more tricks to pull off the best-ever manicure at home.
There are many secrets to getting your nail polish to last longer at home (like this $8 wonder product), but there’s also a lot of bad advice out there. That’s why we spoke to a few trusted pros to get the real scoop. Follow these steps to look like you spent some time with a talented nail tech in a salon—and stay chip-free. Then pair your freshly painted nails with a fabulous at-home pedicure!
Step 1: Prep your nails
Whether or not you’re wearing nail polish, any manicure at home starts with a thorough swipe with a cotton ball or cotton pad soaked in nail polish remover. That’s because in addition to removing nail polish, it removes the natural oils in your nails, and getting rid of that is the key to getting lacquer to stay put, according to Dasha Minina, the nail technician behind Maxus Nails. She recommends using an acetone-based polish remover for the best results. “Acetone has gotten a bad rap in the past, but it really is the best,” she says. “If you go to any professional, they all use it for a reason!” That’s because, she insists, it takes off polish with less tugging and rubbing on the nail bed. And she points out that you can add moisture later after your manicure is over with cuticle oil. (If you’re wearing gel nail polish, check out this guide to taking it off—the process is different.)
Supplies:
Step 2: Shape the tips
Now’s the time to smooth your nails into the shape of your choice. If you want to cut them, do that first to get rid of the length. Then it’s time to file. “When filing your natural nails, you want something less abrasive,” says Annarica (who goes by one name), owner of Raw Vanity Nail Bar. She recommends choosing a fine-grit nail file to gently go over the ends (hint: look for the ones marked for “natural nails,” which are less rough than the ones for gel or acrylics). Then, she says, when it comes to your filing action, “your swipes should be done in one direction and light.” This will cut down on friction that can cause wear and tear on your nails.
Supplies:
Step 3: Clean off cuticle residue
Now it’s time to get any cuticle residue off your nail bed. When doing your manicure at home, Minina recommends skipping the soaking step you may be used to in salons, as the amount of scraping done by a home user doesn’t require it. Instead, she recommends softening up the cuticle before gently pushing it along the surface of the nail with an orange stick. You can use a cuticle remover if you like, but Minina says, “In my salon, we use jojoba butter—it softens things up better!” Plus, it lacks the chemicals commonly found in cuticle removers. Try: Planet Guru Jojoba Body Butter, which is natural-pressed and comes in a jar big enough to last months of manis! Speaking of which, when it’s time to choose a color, you may want to choose a nail polish without toxins.
Supplies:
Step 4: Add a base coat
Base coats work a lot like primer does for your makeup—it smooths out the surface underneath the color and helps your nail polish stay put. But there’s another reason to use it, according to Annarica: “It protects your natural nail from tinting.” Her favorite is Seche Clear Crystal Clear Base Coat, a breakthrough formula that truly won’t allow even the most richly pigmented polishes to leave stains behind.
Supplies:
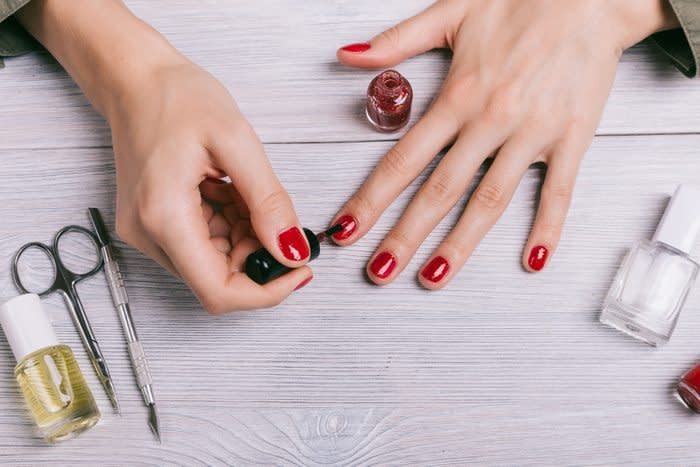
Step 5: Swipe on a coat of polish
The secret to a perfect first layer of polish? Roll—don’t shake—the bottle to mix the polish without creating air bubbles, says Minina. Then pull the brush out of the bottle and “make sure to wipe off the excess on the bottleneck,” she says. “That way, you’re applying a very thin coat.” By the way, these are the subtle things your nail polish reveals about you.
Supplies:
Step 6: Add a second coat
A second coat will even out any streaks in your first coat, says Minina. The key here is waiting at least two minutes between coats. You may want to add a couple of minutes more if you weren’t able to get the polish ultra-thin. “The thicker the coat, the longer it’s going to take for it to dry,” she explains. One step a lot of DIYers skip that makes all the difference: swiping your brush along the tips of your nails, which Minina says “seals the edges of the polish.” This means your polish is less likely to chip!
Supplies:
Step 7: Apply a top coat
A top coat is a sealant containing hardeners that help “cure” the polish while adding shine and one final layer of toughness for a chip-free job. Again, Annarica turns to the brand Seche (a go-to for many salons) when it comes to top coats. “I love Seche Gel Effect Top Coat,” she says. “It’s called gel, but it’s regular polish. It’s amazing quality—super-fast-drying and so shiny!”
Supplies:
Step 8: Allow to dry
This is maybe the most crucial step in getting a great manicure at home. After all, if you get antsy, you’ll end up with nicks and smudges! Depending on the thickness of your coats, Annarica recommends 15 to 30 minutes of drying with a small fan. Any old fan will do, but if you’re a serious nail polish devotee, invest in a nail-specific, battery-operated one so you can set it up anywhere convenient!
Supplies:
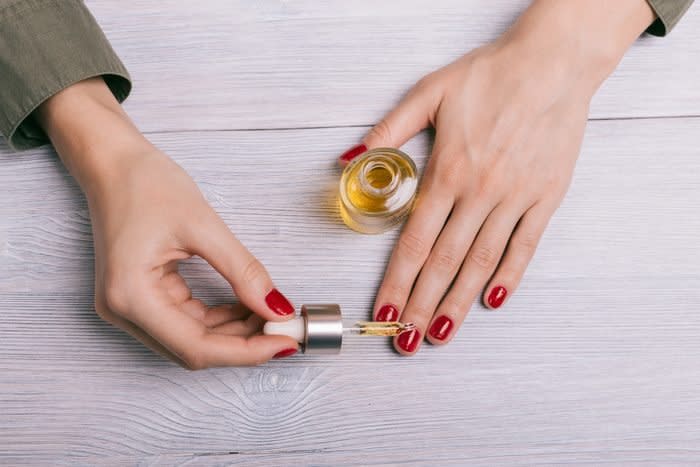
Step 9: Add cuticle oil
Cuticle oil should always come last in your at-home manicure routine when the slickness of the oil can no longer mess with how well your polish attaches to your nail. Annarica calls it a must for moisturizing and helping nails stay strong and healthy. Packed with hydrating oils, these little nourishings are the key to preventing peeling—of both your polish and your nails! Annarica recommends Nail Magic’s Thai Essence cuticle oil, or you can try this cult-favorite Cuccio Naturalé cuticle oil that has more than 67,000 five-star reviews on Amazon.
Supplies:
Sources:
Dasha Minina, the nail technician behind Maxus Nails
Annarica, owner of Raw Vanity Nail Bar
Things You Can Fix with Nail Polish
Things You Won't See in Nail Salons Anymore

How to Get Nail Polish Out of Everything
The post How to Do Your Own Manicure in 9 Steps appeared first on Reader's Digest.
