This Oreo Icebox Cake Has a Layer of Fresh Raspberries
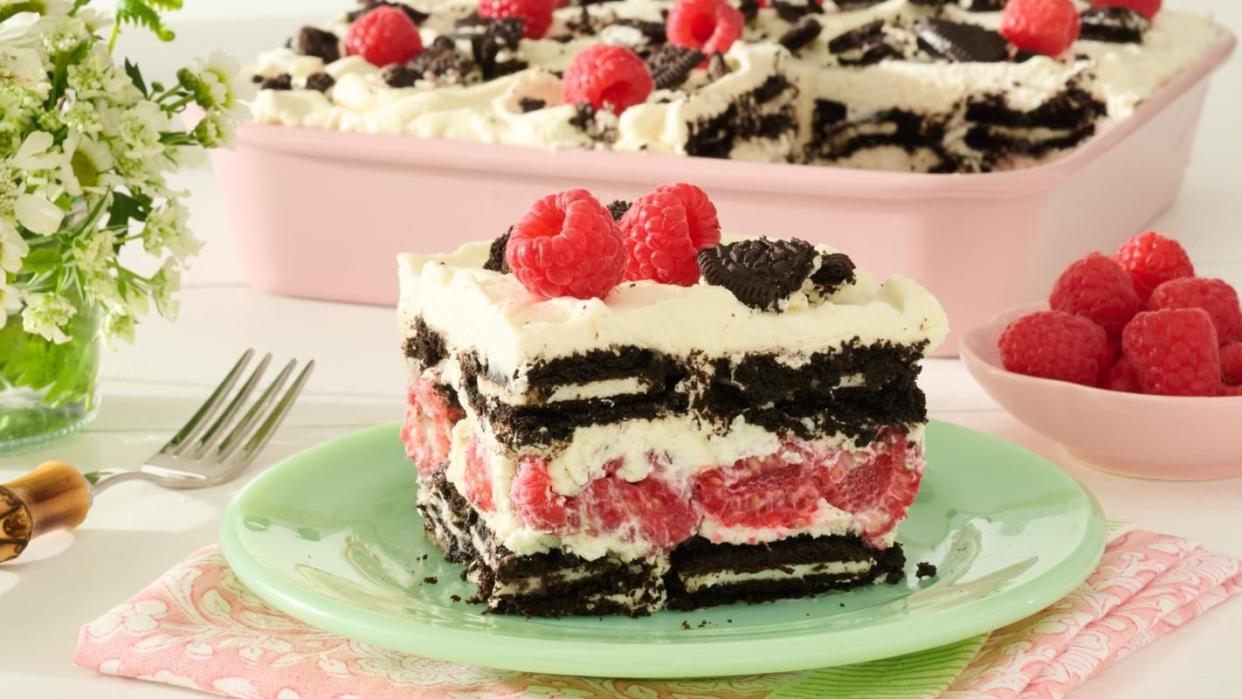
This Oreo icebox cake takes the delicious combination of cookies and cream and dials it up with the addition of fresh, juicy raspberries. No-bake desserts are absolute lifesavers during the summer since they can be made well in advance and won’t heat up the house. With a mere six ingredients, this chocolaty treat is also incredibly easy! Simply whip up the creamy filling, layer it with Oreos and berries, and it’s ready to pop in the fridge to magically transform into a scrumptious Oreo dessert.
Why is it called an icebox cake?
Before there were electric refrigerators, the icebox was the appliance that stored perishable food. Snack food companies jumped on this clever invention and started printing chilled dessert recipes that incorporated their products on the backs of boxes. This was the start of icebox cakes and icebox pies. When crispy cookies are combined with whipped cream and left to sit overnight, they undergo a delightful transformation, becoming soft and airy like a cake. We may use electric refrigerators and freezers today, but icebox desserts continue to stand the test of time, thanks to their ease and deliciousness.
How do you properly whip cream to soft peaks?
Properly whipped cream, stabilized with cream cheese, is the key to a fluffy, sliceable icebox cake. Cream cheese is a magical ingredient in this recipe. It makes the mixture thick and firm, and because it has less water than whipping cream, it keeps it from getting runny or weepy. All it takes is a few minutes in a stand mixer with a paddle attachment. Start by beating the cream cheese until very smooth; you don’t want globs of cream cheese in your beautiful filling. Next, add the powdered sugar and vanilla. Then, gradually beat in the heavy cream, and continue beating until fluffy, soft peaks form. To test for soft peaks, lift the paddle out of the cream. The cream should be firm enough to barely hold its shape, with peaks falling over.
Do you need an electric mixer to make Oreo icebox cake?
If you don't have an electric mixer or stand mixer, you can still enjoy this delightful treat! Just take it back to the icebox days and employ a regular whisk and a little bit of elbow grease. The key is to ensure the cream cheese is at room temperature (it is very challenging to smooth out cold cream cheese!). After whisking the cream cheese until smooth and fluffy, whisk in the powdered sugar and vanilla. The powdered sugar softens the cream cheese even more. And remember: Cold whipping cream is easier to whip! Whisking constantly, slowly stream in the first cup of whipping cream until it is well incorporated. Then, roll up your sleeves, add the last 2 cups of heavy cream, and keep whisking. Make sure to move the whisk back and forth to quickly incorporate plenty of air into the whipped cream. Your arms will thank you! After the cream reaches soft peaks, it is ready to use.
Yields: 8-10 servings
Prep Time: 30 mins
Total Time: 4 hours 30 mins
Ingredients
1
(8-oz.) package cream cheese, at room temperature
1 c.
powdered sugar
1 tbsp.
vanilla extract
3 c.
heavy cream, divided
50
chocolate sandwich cookies, such as Oreos, plus more for topping (from a 25.5-oz. package)
3
(6-oz.) containers raspberries, divided
Directions
In the bowl of a stand mixer fitted with the paddle attachment, beat the cream cheese on medium speed until smooth, 1 to 2 minutes. Add the powdered sugar and vanilla, and beat on low speed until combined, about 30 seconds. Scrape the sides and bottom of the bowl with a rubber spatula. Increase the speed to medium, and beat until smooth, 1 minute more.
Scrape the sides and bottom of the bowl. Add 1 cup of the heavy cream, and beat on low speed until smooth. Add the remaining 2 cups of heavy cream, increase the speed to medium high, and beat until soft peaks form, 1 to 2 minutes.
Spoon ¼ cup of the cream mixture into the bottom of a 9-inch square baking dish, smoothing into a thin, even layer.
Top the cream mixture with a single layer of cookies, breaking some as needed to fit. Spread about 1 ½ cups of the cream mixture over the cookies, smoothing into an even layer with a spoon or offset spatula. Top with an even layer of raspberries from 2 (6-ounce) containers. Add another 1 ½ cups of the cream mixture, smoothing into an even layer. Top with a final layer of cookies, then add the remaining cream mixture on top, smoothing into an even layer.
Cover with plastic wrap and refrigerate for at least 4 hours or up to 12 hours.
Decorate the cake as desired with crumbled cookies and the remaining raspberries. Use a serrated knife to slice and serve.
Tip: If you don't like raspberries or can't find any fresh ones, feel free to omit them.
You Might Also Like


