How to Fix a Running Toilet and ZERO Plumbing Skills Are Required
"Hearst Magazines and Yahoo may earn commission or revenue on some items through these links."
Unfortunately, you can’t ignore a running toilet. Although it may seem like a loud noise that you can adjust to over time, if left unchecked, it can cause a major leak or flood, requiring a major plumbing repair. Plus, your running toilet is wasting water every day according to the United States Geological Survey: 22 gallons of water a day and up to 8,000 gallons in a year. Fixing a running toilet is one of those things—if you put your mind to it, you can do it all on your own (without professional help ). Before you start, read the expert advice we received from Louis Malvasi, owner of Lane Mechanical Plumbing, Heating, and Cooling Inc. It's a step-by-step guide to fixing a running toilet by yourself.
Here's everything you need to know about fixing a running toilet.
Is My Toilet Running?
It's pretty simple to figure out if you've got a running toilet—you'll hear it. If your toilet sounds like it's constantly flushing, it's running. It also means you might have a leak, so you need to address it right away.
What Tools Do I Need?
You'll need to gather a tool kit to repair your toilet. This project should take you about thirty minutes. But remember, don't rush, and don't forget to turn off the water valve before you get too deep into the project.
Materials
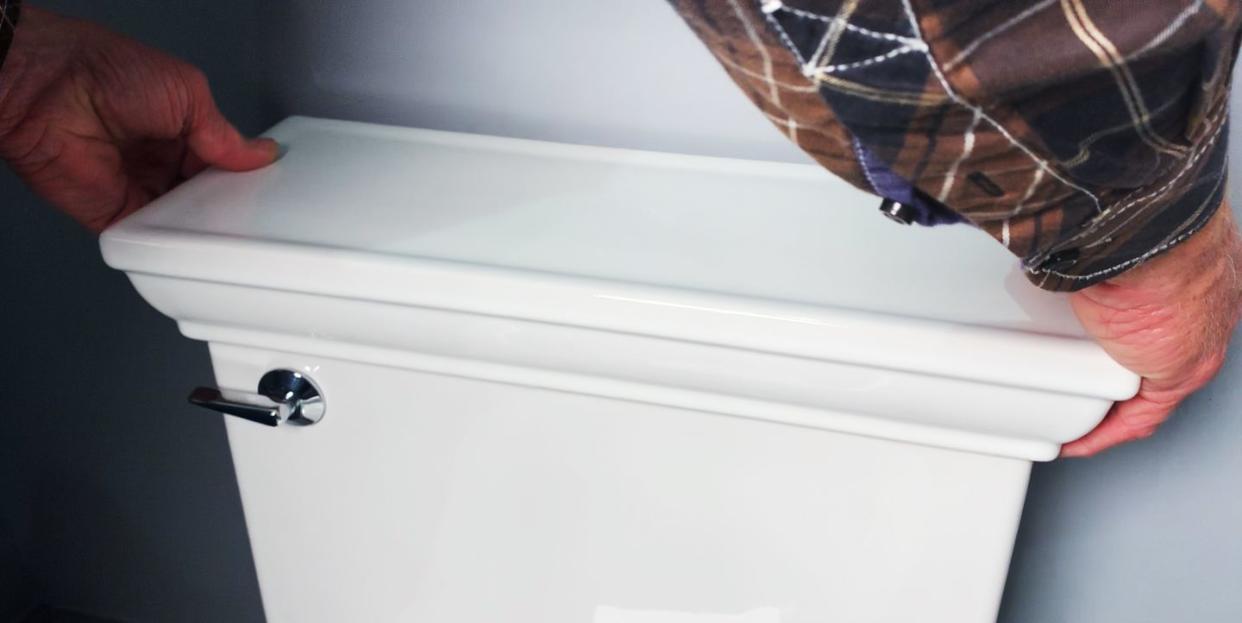
Step One: Remove the Toilet Lid
First, begin by removing the toilet lid on the back of the toilet. Although you've probably looked at this more like a little shelf to place plants or tissues, all the mechanical pieces that keep your toilet running smoothly are inside here.
Step Two: Check the Flush Valve and Flapper
"You check and see if the flush valve is running," said Louis Malvasi, owner of Lane Mechanical Plumbing, Heating, and Cooling Inc. The flush valve will be located in the middle of the tank and includes the overflow tube. The flapper (sometimes a rubber ball) covers the hole when the tank is full.
"Then, you see if the flapper section is allowing water to pass," Malvasi continued. "That's the part that goes up and down when you flush. If those are the issues, which usually they are, you replace the filling device and the flapper."
Basically, you'll see that the water from the back tank is emptying into the bowl without being flushed.
Step 3: How to Fix the Fill Valve
When fixing the flush valve, there are two common problems you can easily fix on your own. The first possibility is the flush valve needs to be adjusted. Use your Phillips head screwdriver and turn the screw on the side of the valve counter-clockwise to lower the float cup and reduce the water level of the overflow tube.
Step 4: How to Replace the Fill Valve
If that doesn't solve the problem, "Then, you'll need to install a new one," Malvasi explains. "You'll need to remove the filling device from the bottom of the tank."
Begin by turning off the water. There is a water valve behind your toilet connected to the wall, and you need to turn the knob to the off position.
Next, flush the toilet (with the top lid still off) to remove as much excess water as possible. Then use a shop vac or sponge to empty the inside of the toilet. Place a bowl underneath the existing flush valve by the wall to catch any water leaks.
Then look for the supply nut. It's underneath the tank of the toilet—unscrew it with your adjustable pliers. Remove the filler tube and retaining nut by turning your pliers counterclockwise. Now take out the entire fill tank safely from the inside of the toilet.
Now you can install the new flush valve inside the toilet and reconnect the flush valve to the supply line in the wall. Get the full video Home Depot tutorial here.
Step 5: How to Replace the Flapper
To replace the flapper, you need to keep the water off, which you already did in step four (don't turn on the water until this entire process is complete). "The flapper comes in different sizes, so you need to find the right size and install it on the flapper portion of the fill valve," advises Malvasi.
Next, remove the flapper from the inside of the toilet. It has a rubbery texture and can slide off the two plastic studs it's attached to. You'll also need to remove the old chain attached to the flapper.
Then install the new flapper by attaching it to the two plastic studs and connecting the chain to the flush handle lever. And make sure the flapper remains down and covers the hole.
Now you can see if all of your hard work paid off. Turn on the water valve, flush the toilet, and put back on the toilet lid. And voilà! You've fixed it all by yourself.
Follow House Beautiful on Instagram.
You Might Also Like
