Mortimer Beckett and the Lost King walkthrough, cheats and tips


General Information
Main Menu

The name of the currently selected player is displayed below the title. To change this, click the black button below the name of the player to display the players window. In the player window, up to five players can be added, selected or deleted.
The Play Game button displays the play game window, where there are options to resume the game from a current point that a player has reached, play a tutorial (required for new players) or start a new game.
The Options button displays a window where music, ambient and SFX volume can be changed. There is also a toggle button for full screen mode.
The Credits button displays a list of the people that were involved in making this game.
The Exit button exits the game if Yes is selected or returns to the main menu if No is selected.
Gameplay
There are eight chapters in the game, and one aim in each chapter is to explore the locations on the map to find all of the items that are displayed at the bottom of the screen. Items that are found are shown in red, with a question mark that can be selected to reveal a hint.
Each item that is found can be used on a specific object or character in one of the locations in that chapter. For example, a corkscrew may be used on a corked bottle. All of the items must eventually be used before the chapter can be completed.
Not all of the items on the object list can be taken straight away, as sometimes a puzzle may have to be solved first before the item becomes available to take.
Using one of the items in the correct place in a chapter can sometimes result in a jewel piece being awarded. All of the jewel pieces must be found in the chapter in order to complete the jewel. The main aim is to restore the eight completed jewels to the crown.
Mini-games have to be completed throughout the course of the chapters, which are generally quite easy. It is not possible to give an exact solution for some of these mini-games as they are random with each new game. Occasionally, an item or clue will to have been found in one of the locations before the mini-game can be completed.
Controls
A red arrow is the default mouse cursor. Move the cursor around the current location and it will change when it passes over an interactive area. Items that can be picked up do not change the cursor, as these are hidden objects that should be searched for and found in each location.
A pointing arrow moves Mortimer to a new location, spinning gears means that an inventory item must be used on this object, a magnifying glass examines a section of the interactive area more closely, a puzzle piece reveals a mini-game that can be solved without using an inventory item and a speech bubble talks to a character.
Press the F1 key to reveal a general tips window that displays these cursors and other important information about the game.
Game Interface
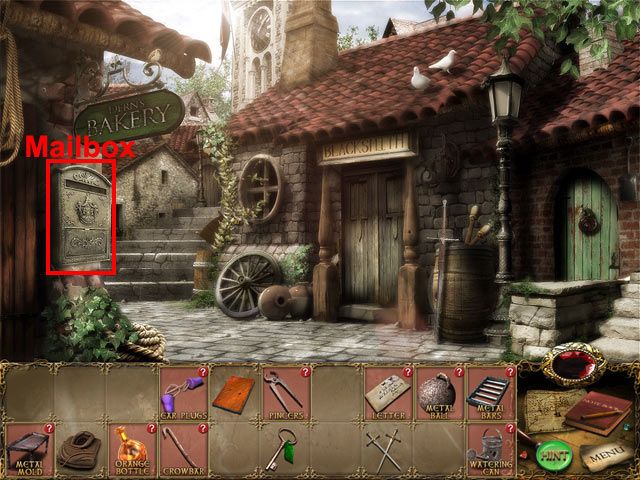
The image below shows the main game action window, where cursors have been added to the image on the hotspots and hidden objects:
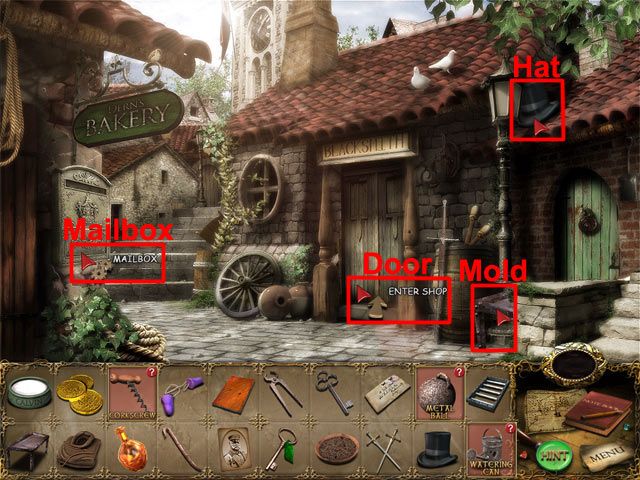
The mailbox shows the gear cursor, so an inventory item will need to be used on it. The door to the blacksmith's shop shows the pointing arrow, so by clicking on the door Mortimer will enter the blacksmith's shop. The top hat and the metal mold do not change the cursor, but by clicking on these two items they will be added to the object list at the bottom of the screen.
The object list is shown below:
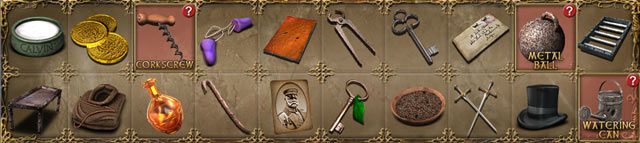
The object list displays all of the objects that are available in the chapter. Objects that have been found are shown in red, and a question mark at the top-right corner of a found item will give a hint on where it should be used. All objects must be found and then used before a chapter can be completed.
The control window is shown below:

A: Jewel panel. This shows how many pieces of the jewel have been found in the chapter. All of the jewel pieces must be found in every chapter.
B: Map. Select the map to travel to a new area in the chapter.
C: Notebook. Select the notebook to read new pieces of information and clues when they are added as you progress through the game.
D: Hint. Pressing the hint button displays the location of a hidden object or interactive location in the area. Pressing the red question mark on a found item in the inventory also uses a hint. After using a hint, it takes two minutes before the hint button becomes active again.
E: Menu. Displays the game options menu, where there are buttons to continue, access the options menu, and to save and exit the game to return to the main menu.
Walkthrough
Please note that the locations of the items shown in the walkthrough below may differ, as there are five possible placements for each item and the locations are random each time. Some objects may appear in the location mentioned in the walkthrough, but for a majority of the objects the walkthrough only gives an indication of where they may be found.
Tutorial
Giant Spider
The game starts near a giant spider in the Braul Forest, where a tutorial must be completed before the main adventure can begin. Take the sickle next to the log and it will be added to the object list at the bottom of the screen. Select the map at the bottom-right corner of the screen and then click the cottage to travel there.
Cottage
Use the sickle on the weeds below the cottage door to reveal a dry brush. Take the dry brush. Click on the cottage door to enter the cottage. Take the crowbar on the floor. Examine the book of spiders on the chair to see that the spider's favorite food is the house fly. Use the crowbar on the closed glue can on the table to open it. Use the dry brush on the open glue can to get the brush with glue. Use the brush with glue on the fly ribbon to take the flies. Select the map.
Giant Spider
Give the flies to the giant spider to complete the tutorial.
Chapter 1 - Town of Dern
Town Square
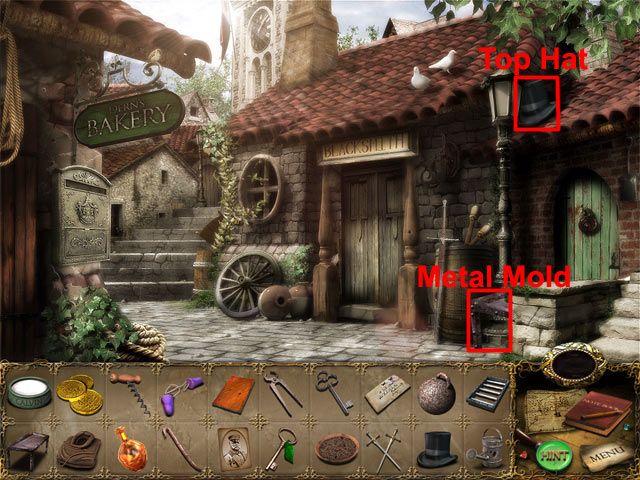
The chapter starts outside the blacksmith's shop in the town square. Take the metal mold at the bottom of the lamppost and the top hat on the roof:
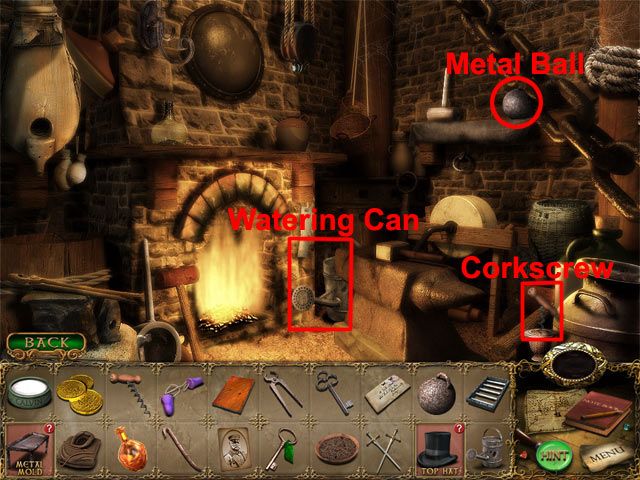
Enter the shop. Take the watering can at the right side of the fireplace, the metal ball on the shelf and the corkscrew near the bottom-right corner of the room:
Select the map.
Church
Take the bowl of milk below the right side of the door:
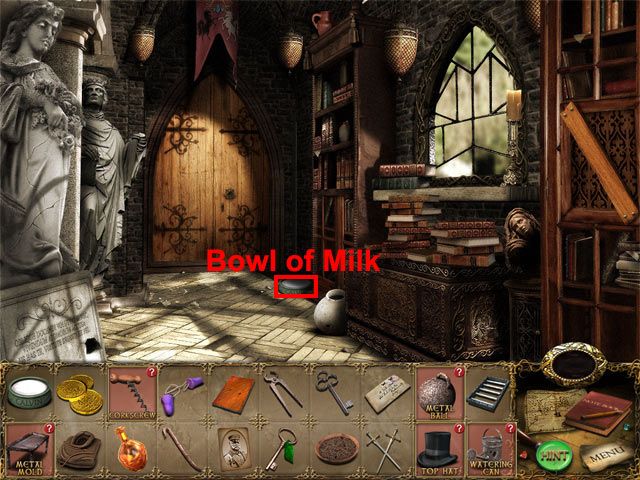
Go through the door to enter the churchyard. Take the old photo on the windowsill and the coins near the base of the tree:

Talk to the monk and he will ask for something to cure his headache when the bells ring. Select the map.
Tavern
Use the corkscrew on the corked bottle of plum juice at the left side of the room to find a jewel piece. Take the iron key on the wall at the left side of the room, the ear plugs on the table and the bowl of seeds on the chair nearest to the tavern keeper:
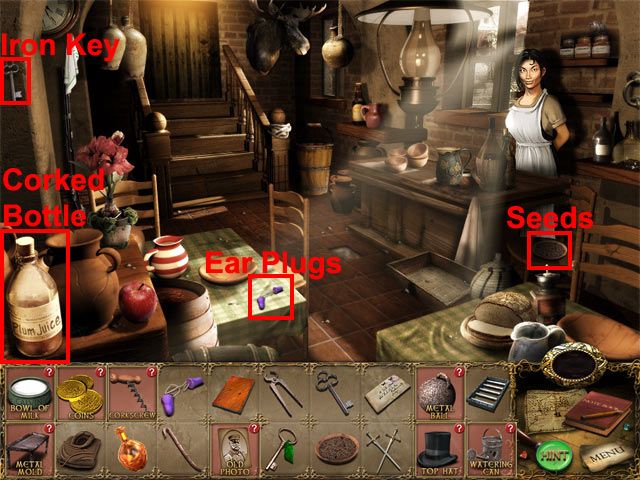
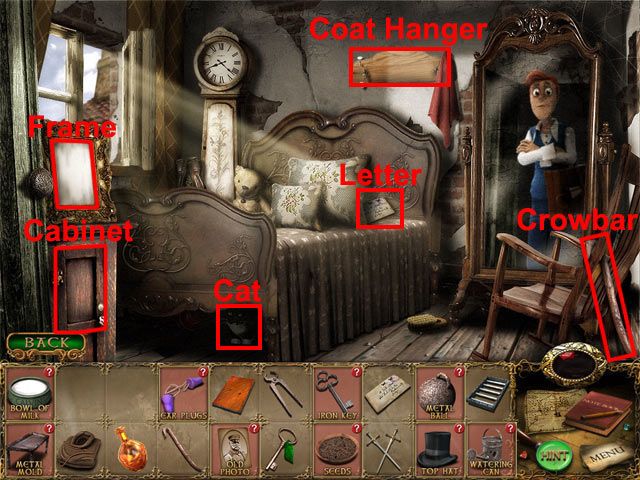
Give the coins to the tavern keeper and the guest room can now be accessed. Enter the guest room. Use the old photo on the picture frame at the left side of the room to find a jewel piece. Give the bowl of milk to the cat under the bed to find a jewel piece. Use the top hat on the coat hanger above the bed to find a jewel piece. Use the iron key on the locked cabinet at the left side of the room and take the orange bottle from inside. Take the letter on the bed and the crowbar leaning on the back of the chair:
Select the map.
River
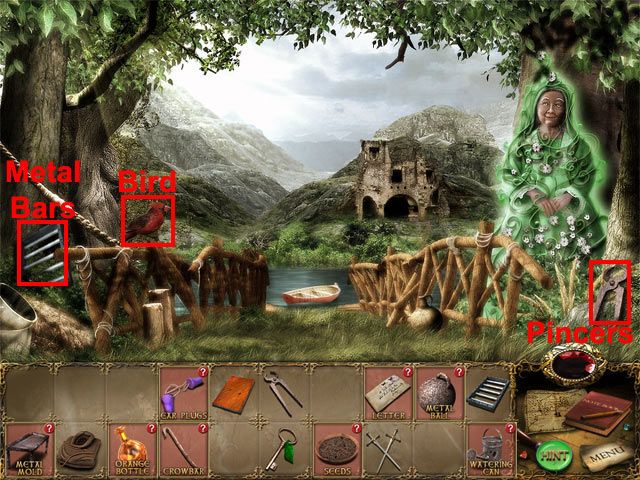
Give the seeds to the bird to find a jewel piece. Take the metal bars at the left side of the bridge and the pincers at the right side of the bridge:
Select the map.
Town Square
Use the letter on the mailbox below the bakery sign to find a jewel piece:
Enter the shop. Use the metal mold on the fire in the fireplace. Use the orange bottle on top of the melting mold in the fireplace and the glass will melt. Use the pincers on the melted glass to take the piece of glass:

Select the map.
Church
Approach the window at the right side of the room to see fifteen pieces of glass around the outside of the window:
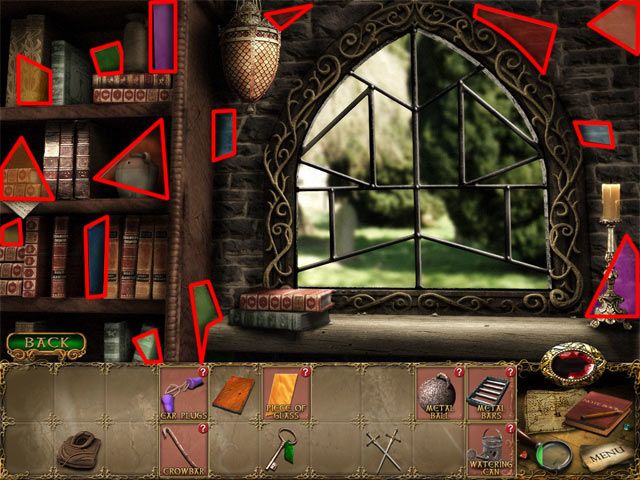
Put the pieces of glass in the correct places on the window to see that there is still one piece of glass missing. Put the piece of glass from the inventory in the remaining slot and light will shine through the window onto the stone plate. Examine the stone plate to make a note of the numbers and colors in the notebook. Take the prison key from the hole:

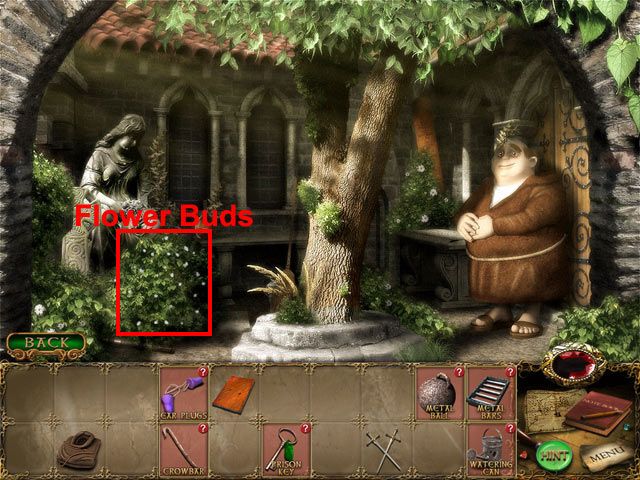
Enter the churchyard. Use the watering can on the flower buds to find a jewel piece:
Give the ear plugs to the monk and he will start ringing the bells. Return to the church. Use the crowbar on the locked cabinet to open it:

Take the monk's robe from the cabinet to complete the area.
Read more at GameZebo >

