12 Things You Should Spring Clean This Weekend To Welcome the Season
Give your home a fresh, clean start.
Kseniya Ovchinnikova/Getty Images
With spring just a few days away, many of us are ready for a reset—in our lives and in our homes—which means cleaning and decluttering are high priority at the moment. After all, nothing beats welcoming the new season with a thoroughly-cleaned house.
You probably already have some kind of cleaning routine established, but if you really want to make sure you’re covering all your bases for a proper spring cleaning, don’t forget to tackle these easy-to-miss spots in your home. Sure, they’re a few extra tasks, but the reward is very much worth it. So gather your supplies, put on some motivating music, and roll up your sleeves.
Related: 12 Game-Changing Pieces of Cleaning Advice, According to the Pros
Meet Our Expert
Leslie Reichert, Boston-based housecleaning veteran behind The Cleaning Coach
April Lane, owner of April Lane's Home Cleaning in Seattle and a board member of the Association of Residential Cleaning Services International (ARCSI)
Ceiling Fans
One way to tackle dust on a ceiling fan is with an extendable, microfiber duster. Before you start, put a sheet on the floor or over any furniture beneath the fan to catch wayward dust balls. Or, if you're comfortable on a step stool or ladder, try this popular pillowcase hack: Place a clean pillowcase over one blade at a time and then carefully slide it off, trapping the dust inside. Use a dry microfiber cloth to wipe dust from other parts of the fan as well as the lightbulbs.
If your fan has glass shades, soak them in warm, soapy water and dry completely before putting them back on. Last step: Check that your fan is set to spin counterclockwise so it's ready to cool the room as the days heat up.
Windows and Curtains
Give your windows a one-two punch of sparkle with this multitasking trick: Strip fabric treatments from every window in the room and tumble them in a cool dryer for 15 minutes. While the dryer shakes dust from your curtains, dampen an eyeglass-grade microfiber cloth with water and use it to clean windows, streak-free. Swipe a water-dampened regular microfiber rag over the woodwork trim, then remove window treatments from the dryer and hang immediately to avoid wrinkling.
Blinds and Pleated Shades
Working from top to bottom, run the long-bristle attachment on your vacuum horizontally along pleated or honeycomb shades to remove dust and dirt. The gentle bristles protect the material while the vacuum's suction does the work. In the kitchen and bath, where grease and steam makes dust adhere to surfaces, dampen microfiber with water before wiping blinds.
Wall Art
When it comes to wall art and framed mirrors, pull down pictures and run a microfiber cloth over the front and back of the frame as well as the wall. Pro tip: Never spritz glass cleaner directly on glass—moisture can seep behind the glass and ruin your photos or art. Instead, use a fine microfiber cloth to remove dust from glass or spray your solution directly on the cloth, then apply to clean the surface.
Lampshades
Using the long-bristle vacuum attachment, circle the top and bottom band of the lampshade to suck up dust without catching or disturbing the trim. Run the brush up and down the sides of the shade to clean the entire surface. (If you don’t want to lug out the vacuum for this, you can also run a lint roller over the shade.)
Plants
For plants with shiny leaves, use a damp cloth or paper towel to gently wipe the dust off of the leaves, holding the bottom of each leaf for support. For fuzzy plants, dust the leaves with a soft paintbrush. While you're at it, wipe down the plant's pot with a microfiber cloth or clean rag.
Baseboards
Depending on the size of your home, this may not be the quickest task to tackle, but it is super satisfying. Start by removing dust with your vacuum's brush attachment. Follow up by wiping down baseboards with a cloth dampened with a warm water-dish soap combo. Dry baseboards with a clean microfiber cloth. Work your way around the room to ensure you don't miss any spots.
Kitchen Cabinets
With cabinets, gentle cleaning is best. Skip the abrasive products and use a solution of warm water and dish soap. First, empty your cabinets and drawers and vacuum up crumbs and debris using a crevice attachment. Next, wet a soft cloth with the soap and water solution and wring it out until it is just damp. Wipe down the inside and outside of the cabinets as well as handles or knobs.
Don't forget to go over frames or trim where grime can accumulate. Follow with a cloth slightly dampened with plain water to rinse and then dry thoroughly with another soft cloth. Use a glass cleaner on any glass cabinet fronts.
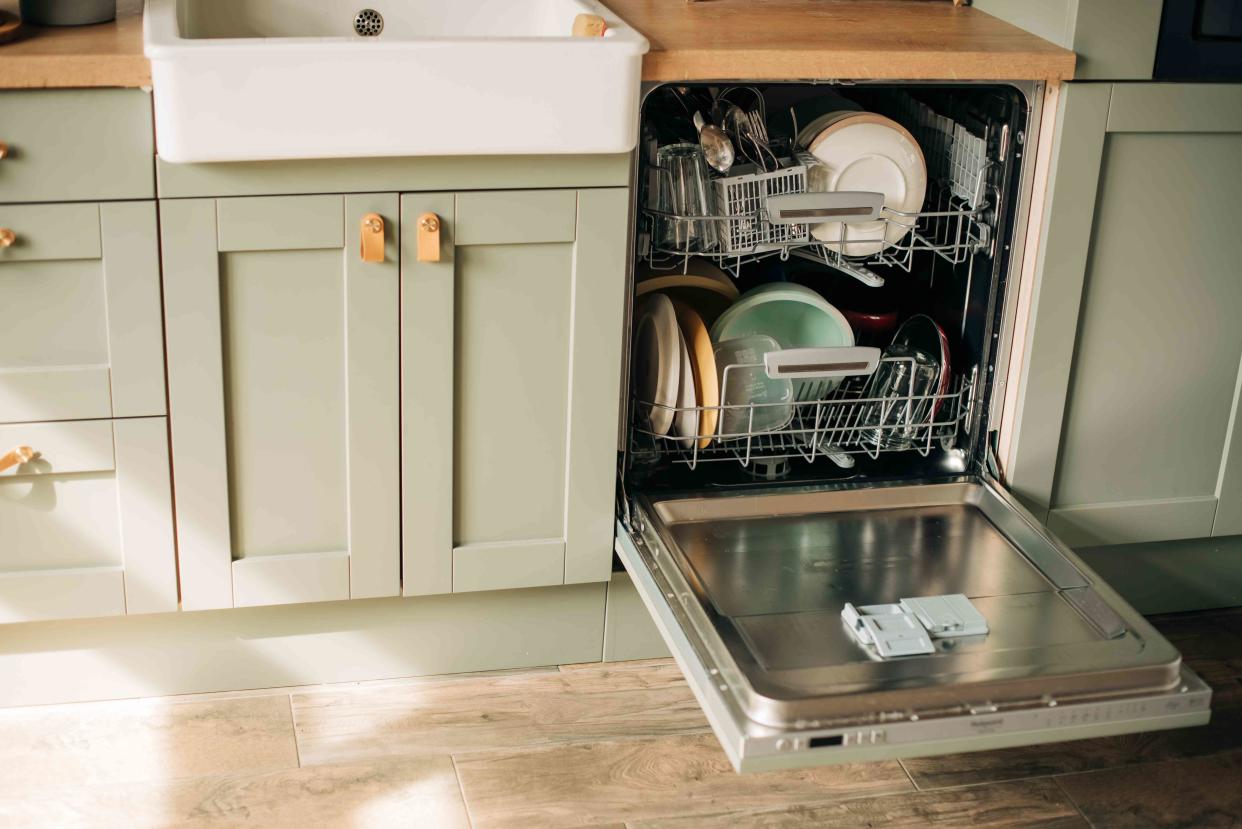
Dishwasher
Add non-abrasive cleanser (like Bon Ami) to a damp microfiber cloth and run it along the inside rim of the dishwasher door, then spritz with water and wipe dry. Pour 1/2 cup distilled white vinegar into the reservoir, or place a small bowl filled with vinegar on the bottom rack, and run an empty cycle to remove mineral build-up.
Small Appliances
Kitchen appliances work hard on a regular basis. Even the smaller ones, such as your toaster and hand mixer, can benefit from a seasonal spruce-up. To banish dried-on batter, smoothie, or sauce from your hand mixer and blender base, rub the exteriors with a damp cloth. Don't forget to wipe the cords (unplugged, of course) as well, since they can also be targets for splatters.
To clean your toaster, start by unplugging it and gently shaking it upside down over the trash to dislodge crumbs. Remove the crumb tray and wipe it and the exterior of the toaster down with a damp cloth. Dry the crumb tray completely with another cloth before replacing it. Finally, use a clean, damp cloth to wipe down your coffee machine base. Other parts, including the carafe, lid, and filter basket, can be washed in warm, soapy water. If you haven't cleaned your Keurig recently, follow these steps to descale it.
Mattress and Headboard
Run a clean microfiber cloth over wood headboards, footboards, and mattress frames. For upholstered pieces, systematically vacuum with a long-bristle attachment, working from the top-down. Pay extra attention to tufted or pleated areas. Then, sweep a long-bristle attachment along the sides of the mattress and box spring, focusing on the welting at the edges, where dust can get trapped.
Dryer Vent
To clean out the dryer vent, detach the tubing from the back of the dryer and vacuum it well or use a brush to dislodge any lint stuck inside. Finally, give your lint screen a quick scrub with a soft brush—a clean toothbrush works well—and soapy water. Then rinse, air-dry completely, and replace.
Note that you should thoroughly clean the dryer vent at least once a year. Lint buildup not only makes your laundry take longer to dry, but it's also a fire hazard. Also, If you've been a little lax about regularly sweeping or vacuuming around your machine, now is as good a time as any to catch up.
Related: 10 Ways to Clean Smarter, Not Harder
For more Real Simple news, make sure to sign up for our newsletter!
Read the original article on Real Simple.
